Who doesn’t love FREE? VRC delivers awesome samples of our award winning content free to you? Why, because we think once you read the magazine you’ll join the billions who already do. Wait, that’s how many people who are served at McDonald’s. Below is the old fashioned blog post of the free content, or you can click the link to view the magazine in all it’s beautiful glory. Once you get a taste you can subscribe for just $9.99/year and ever miss an issue!
https://vrcmag.com/free_articles/droop_with_JQ/

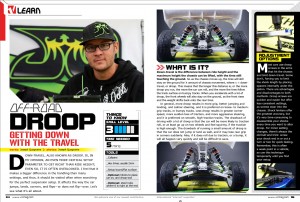
Down-travel, also known as droop, is, in my opinion, an even more critical setup parameter to get right than ride height; even so, it is often overlooked. I feel that it makes a bigger difference in the handling than many settings, and thus, it should be visited often when searching for the perfect suspension setup. It affects the way the car jumps, lands, corners, and flips—or does not flip—over. Let’s see what it’s all about.

Difficulty Meter: Intermediate
Time Needed
• 5 minutes
Tools Needed
• Calipers
• Hex driver, usually 2mm
• Setup board or other flat surface
• Optional: blocks to place car on, and droop tool
• Optional: steel ruler, where 0 is right at the end
WHAT IS IT?
Down-travel is the difference between ride height and the maximum height the chassis can be lifted, with the tires still touching the ground. So as the chassis moves up, the tires will still stay on the ground for X amount of chassis movement, where x = down-travel, or droop. This means that the longer this distance is, or the more droop you run, the more the car can roll, and the more the tires follow the track surface on bumpy tracks. When you accelerate with a lot of droop, the front wheels will also stay on the ground, as the front rises and the weight shifts back onto the rear tires.
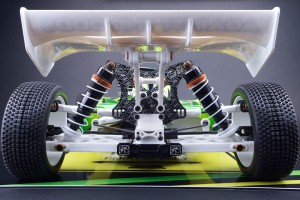
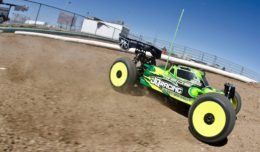
In general, more droop results in more grip, better jumping and landing, and calmer steering, and it is preferred on loose- to medium-grip tracks, or bumpy tracks. Less droop results in greater corner speed, more sudden loss of traction, and more aggressive steering, and it is preferred on smooth, high-traction tracks. The drawback of driving with a lot of droop is that the car will be more likely to traction roll, or at least go up on two wheels and feel squirmy, if the traction is high enough. The drawback of running a small amount of droop is that the car does not jump or land as well, and it may lose rear grip in corners suddenly. Also, if it does roll due to traction, or a bump, it will all happen very quickly and will be difficult to save.
MEASURING DROOP
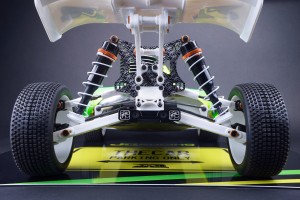
Droop may be measured in various ways, but it doesn’t really matter how you do it, as long as you are consistent with your method and you know what you are doing. The method used most often is to measure the length of the shock, top center to bottom center. You need to make sure that the left and right shock lengths are the same. Doing it this way, you cannot compare different cars, or different shock positions, because even though the shock lengths are the same, the actual amount of down-travel may be different. So you either have to know what the right length is for each shock position (or hub position, if there are more than one), or you need to use another method.
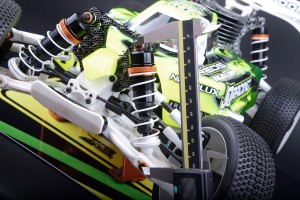
Another way, and the only way to check the actual real down-travel, is to use a ruler and measure the distance from the chassis to the surface at the point where the tires are just about to lose contact with the ground. Subtracting the ride height measurement from this figure will give you your actual droop setting. Doing this, you can easily compare no matter what setup you run for shocks and hubs, and you can also compare with other cars.
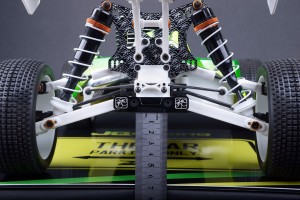
The last way is to place the car, without wheels, on standard height blocks and measure the distance from the surface to the bottom of the wheel hex threads. Using this measurement, you just have to know what the measurements are that work, and work with them. This method is a bit counter-intuitive, as a smaller distance equals more droop, and vice versa.
ADJUSTING DROOP FOR HANDLING
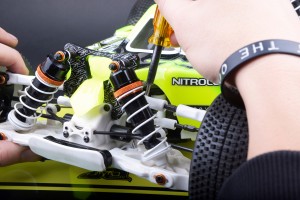
Droop affects the handling of the car greatly, so it doesn’t require extreme adjustments to notice a difference. Just a few millimeters’ change is already clearly noticeable. It is important to find a strong starting setting that will always work well, and then for each track, try adjusting shock length 1- to 2mm each way, with different combinations in the front and rear. This translates to a bit more in actual wheel movement, but it is enough. Larger changes are not used, as they would upset the overall balance of the car.
WHAT TO DO WHEN
Reduce overall droop: if you are on a high-grip, smooth, fast track, and you feel like the car wants to bicycle (go up on two wheels).
Reduce front droop: if you want more responsive steering.
Reduce rear droop: if your car is good but you are lacking just a bit of corner speed, and your rear feels stuck, reducing droop will allow the chassis to rotate around corners faster.
Increase overall droop: if you are struggling with an inconsistent car, spinning out, or not holding the line in corners—especially if the track has uneven traction, bumps, or rutted jumps. More overall droop could help.
Increase front droop: if you need the car to jump and land better, or if you need your car to behave better on power, especially exiting corners.
Increase rear droop: if you feel you lose rear traction on entry, to mid corner, or in bumps, you can try more rear droop.
ADJUSTMENT OPTIONS
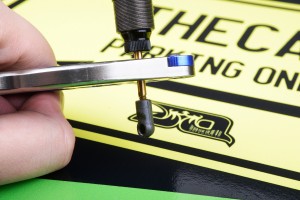
Most cars use droop screws in the arms that hit the chassis and limit down-travel. Some don’t, forcing you to limit the shock length by placing spacers internally under the piston. There are advantages and disadvantages to both methods. Droop screws are quicker and easier but offer less consistent settings, as screws wear into the chassis. Shock limiters offer the greatest accuracy, but it’s very time-consuming to disassemble your shocks every time you want to alter droop. For minor setting changes, there’s always the old ball-end trick: screw your shock end in or out a turn or two for quick testing. Remember, this is often a weak point in a vehicle, so use this technique temporarily until you find your setup.
IT ISN’T ALWAYS THAT SIMPLE
Interestingly, at times, down-travel can have unexpected results. For example, if the track is extremely bumpy, less down-travel may actually be better because instead of going into all the holes, the car skips over them! At other times, more down-travel may actually be better on a high-grip track, as the driver has more control over the point at which anything unexpected occurs, and everything happens more slowly.

CLOSING
There you have it; a simple adjustment that can determine whether your car will be brilliant or difficult to drive. Remember to check your droop settings frequently. In a race, check it before every run! Yes, you read that right. Don’t be lazy; keep checking and adjusting.

